17 October 2013

I haven't forgotten you!!....

As if this year hasn't already been crazy and eventful, I have some more amazing changes coming up in my life.

Firstly though I have had to give up being The Little Big Markets photographer before I had begun which was a real bummer, as I was really looking forward to that. But I won't be able to afford the time as I'm now part of an awesome cafe and so excited to bring some new life, colour and flavour to a fantastic community.
So, watch this space and if you are ever heading to the Bay of Plenty, stop in at Cafe Nineteen at Fairview Golf Course in Katikati and come and see us!!

I'll still be posting lots here with recipes and photos...but only once I get my head around finding where everything is in the new work environment!

xx


15 September 2013

5 Years

I just realised today that I've been blogging at this address for 5 years this month.

I popped back and had a look today at my very first post and it makes me squirm. I'm almost too embarrassed to link to it! But as a kinda very lame blog birthday present here it is... It consists of a VERY average photo of a packet mix I did with the kids.
It's cute but I took my photos with a point and shoot and I had no idea what I was doing except that I wanted some place to show my small but meaningful (for the kids anyway) efforts. Wow, what a long way we've all come. Haha.

Now some bloggers with lots of sponsors and time to organise do amazing giveaways and awesome stuff for their blogaversaries (I kinda really dislike that word) but I'm afraid I've got nothing for you, except to say thank you. It's quite humbling to think that people like what I do, make, see and create. As well as all the cheerleaders and the sense of community that blogging brings, I've made friends with fellow bakers, photographers, mothers, and breast cancer survivors that also blog. I've even been lucky enough to have met and become friends with some of them in real life not just online. I've been given an outlet to my creativity while keeping my family in the loop of our life, especially during tough times. Not trying to blow my own trumpet, but you can see how far I've come since that first blog entry as without this outlet I would have never entered "that baking competition", had recipes published, had photos reproduced in books, submitted and had published magazine articles, published a book or most important to me, be a voice for breast cancer.
Maybe one day someone might pay me for it?

Simply I want to say thanks, and I'll just keep on doing what I'm doing. I love this place. I hope you do too.

xx


Follow my blog with Bloglovin

11 September 2013

Behind the scenes....

there's always these two. Trying to be stealth and sneak up on me...


Inky kept photobombing me with his ears.

Coco Moco Slice

I don't know why I called it that. It sounded catchy.


This is a coconut mocha slice and its very smooth and sweet - I wasn't sure how this would go down, too sweet is sometimes overwhelming but the day after I made this it tasted even better so its one of those 'its even better the next day' recipes. And I keep eating it...it's delicious!

I can't take credit for the recipe though, this one comes courtesy of one of Grandma Farrell's Australian Women's Weekly recipe books I inherited (complete with all her notes and adaptations for her favourites which makes it extra special). If you, or the person/people you are making it for don't like coconut you could take that out and use oats, or even ground almonds...hmm now that I've mentioned it I might try it with that too.


Base:
90g coconut
1/2 cup self raising flour
1/3 brown sugar
100g butter, cubed

Mocha Topping:
2 teaspoons instant coffee
1 tablespoon hot water
395g can sweetened condensed milk
100g dark chocolate, chopped
30g butter

Grease and line a square or oblong baking tin. 
Heat oven to 180 deg C.
Combine coconut, flour, sugar in a bowl and add butter. Mix with paddle beater in electric mixer until the butter is combined in the dry mix and resembles breadcrumbs or if you like the long version you can rub the butter into the mix with your hands (I prefer the quick way). Take mixture out and press into baking tin firmly and evenly.
Bake for approximately 12 minutes - or until the top is golden.

Mocha Topping:
While the base is baking you should start on this. Dissolve the coffee in the hot water in a medium size saucepan. Then add the remaining ingredients and stir over a low heat until the butter and chocolate has melted. Bring to the boil and let it simmer for about 3 minutes and it is thick and coats the back of a spoon well.

When base is cooked leave for 10 minutes until pouring topping over. Sprinkle with extra coconut (I used some lovely BIG chunks of Ceres Organic Coconut Chips because they are crunchy and so delicious).
Let cool to room temperature and then place in fridge to set.
Once set it will cut beautifully.


10 September 2013

The Bees are Back...


Yeah. I'm not getting too close. It appears they are here to stay. 
I wonder how many stings the kids will get this season? Last year the tally was 6, most of them strangely deliberate. 
Katie considers herself the 'bee whisperer' around here and is enjoying watching the man come to take the honey.


Did I mention this is my favourite season?

23 August 2013

Peppermint Mallow Brownie {with bonus GF version}

A minty and chocolaty treat for your Friday, courtesy of me and the Edmonds cookbook, where I've adapted and combined the chocolate coconut brownie recipe and the marshmallow recipe for the gluten version. Then I used my own made up version for the gluten free base.


There's a few steps but essentially its pretty easy to make.

Yield: 15 slices (depending on how big you cut them!)
Prep time: 10 mins brownie 10 mins marshmallow
Cook time: 15 mins brownie and 25 mins marshmallow

Brownie
125g butter
1/4 cup cocoa powder
1 cup sugar
2 eggs
1/2 teaspoon vanilla essence
1/4 cup coconut flakes
1/4 cup almond flakes
1/2 cup plain flour
1/2 teaspoon baking powder
1/4 cup dark choc drops

Preheat oven to 190 deg C
Line brownie tin with baking paper
Gently melt butter in a saucepan, when melted take off heat and add the cocoa. Mix well then add the sugar. Then add the eggs one at a time. Add the vanilla, coconut and almonds and mix well. Then sift flour, baking powder and add and mix well. Then add the chocolate drops.
Put mix into tin, spread so its even and then bake for 15 minutes. The middle will be soft and gooey...that's okay its normal.

GF Base
125g butter
2 tablespoons coconut oil
70g ground almonds
1/4 cup cocoa powder
1/4 cup almond flakes
1/2 cup dessicated coconut
1/2 cup sugar
1 egg

Combine the almonds, cocoa, almond flakes, coconut and sugar in a bowl and mix thoroughly.
Melt the butter and the coconut oil and making a well in the dry mix pour in and mix through well. Add the egg and mix in well.
Put mix in brownie tin and evenly spread it. Bake for 15 mins. 
Obviously it won't be as gooey as the gluten version but its nutty and delicious.


While baking you can start on the marshmallow. When baked, set aside to cool.


Marshmallow
1 tablespoons gelatin
1/4 cup water
1 cup sugar
1/2 cup water
1 teaspoon peppermint essence
mint green food colouring

Add the gelatin to the first measure of water in a heat or microwave proof bowl and set aside until it is swollen and its absorbed all the liquid.
Combine the second measure of water into a medium saucepan with the sugar and heat gently until all the sugar has dissolved.
Bung the gelatin in the microwave for 30 seconds or heat gently over a bain marie until it is a liquid and then add it to the sugar mix.
Bring to a boil and let it simmer for 15 minutes.
Take off heat and allow to cool to lukewarm.

In a mixer (stand or hand held), using a whisk attachment beat the sugar mix until it is white and fluffy and thick. Then add the essence and colouring until it is the colour and taste you desire.
Pour immediately over the cooked brownie mix.
You can either let it set as is or add some melted chocolate and swirl it in just before it sets. Or cover it completely with a melted chocolate topping. Or top it with coconut flakes. Or just eat it straight away?

Pop in the fridge for 1 hour before cutting to allow the marshmallow to set properly.

Enjoy!

xx


21 August 2013

Raspberry Muffins

I'm a big fan of the muffin. It's easy, quick and a great lunchbox filler or if you have guests coming a fast treat to whip up. Then there's the choice of ingredients...so many choices. Sweet or savoury? Cheesy or chocolately? Spicy or syrupy?


Today I've gone with sweet and simple. Raspberry sweet with a little bit of chocolate thrown in for good measure. Because I can't help it - I try to put chocolate in as much as I can.

These I whipped up for school lunches and for the big man to take to work. They're big enough so he feels manly eating it (no delicate dainty cupcakes for him) and big enough for the kids to probably have half at morning tea and the other half at lunch!


So here's the ingredients: 

Yield: 6 Texas size muffins or 12 regular size.
Prep time: 10mins
Cook time: 25-30mins

75g butter, softened
1/2 cup sugar
2 eggs
1/2 cup milk
1 cup plain yogurt (as in, no added sugar)
1/2 cup frozen raspberries
handful of choc chips (white chocolate goes REALLY well with this muffin, but I only had dark chocolate drops...so I used them instead)
1/4 teaspoon baking soda
2 cups self raising flour.

Preheat oven to 200 deg C and line a Texas muffin tin. I don't have big sized liners so I just cut up cooking paper into squares and fit them in - or just oil the tin and have no liner. It's your call.
Cream butter and sugar until light and fluffy. Add eggs one at a time. Add milk and yogurt and mix well. Then add the raspberries and chocolate, flour and baking soda and CAREFULLY fold through with a spatula (not your electric mixer). 
The trick to a successful fluffy muffin is the care you take in folding through the mix so its just incorporated - its okay if you still see bits of flour. Thorough mixing will only result in a flat and heavy muffin.

Spoon into the muffin tin and bake for 25-30mins.

These are best served on the same day you make them, as muffins tend to dry out fairly quickly.


This is also my entry for August's Sweet NZ hosted by Sweets & Brains -  I haven't participated for a few months. So its time to get back into it.

07 August 2013

Lemon Meringue Cupcakes


These beauties are preeminent of spring, because today feels like spring. We've had sunny clear skies and temps in the low twenties yet we are still well entrenched in winter...not really very wintry though. So I made these because I love the plain vanilla cupcake, the tart but creamy lemon curd and the sumptuous gooey meringue...and the crunch and flavour of toasted coconut. On their own very nice, but together? Super delicious!

Enjoy....


Vanilla Cupcake

1 1/4 cup plain flour
1 1/4 tsp baking powder
1/2 tsp baking soda
1/2 tsp salt
2 eggs
3/4 cup sugar
1 1/2 tsp vanilla
1/2 cup oil
1/2 cup buttermilk
1/4 cup lemon curd (homemade or bought, I've included a recipe below)
2 egg whites
1 cup sugar
1 teaspoon vanilla

Preheat your oven to 180 deg C
Combine flour, baking powder, soda and salt into a bowl.
In a separate bowl mix the eggs, sugar, vanilla and oil together and beat well. Combine the half of the dry mix with half of the buttermilk to the wet mix and mix well, combine the other half and beat until mixture is smooth.

Spoon into cupcake papers and fill 3/4 of the way.

Bake for 15-20 mins or until the sponge springs back when pressed.

When cooled, using a knife cut out a small section at the top of the cupcake in which to fill with the lemon curd. Fill with the curd and then pipe with the meringue topping then sprinkle with the toasted coconut flakes.


Lemon Curd (from Treats from Little and Friday cookbook)
125g unsalted butter
1 cup caster sugar
juice and zest of 4 lemons
3 large eggs

Place all ingredients except eggs into a metal bowl. Place bowl over a saucepan of simmering water and stir until sugar has dissolved completely. Remove from heat when there are no sugar granules left.
In another bowl beat the eggs, add butter and sugar mixture to the eggs and beat until combined. Pour mixture through a strainer to remove the zest and place mixture back over simmering water and heat slowly until thick enough to coat a spoon. 
This makes 2 cups and will keep in the fridge for up to 3 weeks.


Swiss Meringue

Fill a saucepan 1/4 full and heat until simmering.
Place the egg whites and sugar into a bowl (preferably your metal mixing bowl) and put over simmering water, whisking constantly until sugar is dissolved (you can test this by rubbing mixture between your fingers, it is done when you can't feel any granules).
Take your bowl off the heat and using a whisk attachment whisk until glossy and thick peaks form. Add the vanilla and mix in.
Fill a piping bag and decorate cupcake, add toasted coconut flakes.


23 July 2013

Our Place

There's a new two week old calf at Owen's work...


Sadly he wouldn't go near us. But the bull did.


*I'll get back to baking soon. I'm enjoying my break.

18 July 2013

Feeling Whole

This is a post I've been wondering about writing over the last few days.
I was thinking of how I would communicate the feelings I have about everything since my reconstruction surgery. So this might be a little long and rambly...

My feelings before the surgery were determined, if a little strange and ambiguous to some and it was really hard to explain to people why I was putting myself through it. One of my best girlfriends cringed when I told her the extent of the surgery and in horror exclaimed "why do you want to do that?!!". 
I probably would have asked that too. Sure, it sounded barbaric. Having an abdominal muscle removed, strapped to my chest, skin and tissue removed and a breast shaped from it, part of a rib removed, hours spent under anesthetic while the surgical team painstakingly connect all the blood vessels and then hope like hell it all takes and doesn't reject from my body. Then there is the waking up and recovery from all that. They told me it could take 12 weeks to fully recover. Yikes, who would really put their hands up for all that pain just for one breast? Surely only someone really crazy.
Even Owen was dubious it was worth it. Especially when he was happy with the status quo (geez I love that man).

But I couldn't NOT do it. I just knew I had to do it. Perhaps its like drawing a line in the sand? Me before cancer, me during cancer, me after cancer - I feel like somewhere in all that mess I lost a part of me a bit and this was a way of finding me in that again. I won't lie, before cancer my D cup cleavage was a part of me I was proud of it. Afterwards the need to cover up so people don't feel uncomfortable looking at my lopsidedness was horrible. As for wearing togs...well it was a hassle and I've never felt more unattractive. No one told me I was, I just felt that way.
The other more important reason was I felt I could move on mentally if this was done. Like coming full circle and being able to say cancer happened and its NOT going to rule me anymore. Sure, anyone who has a breast cancer diagnosis knows the endless worry as we are never really 100% sure it won't come back 1,2,5,10+ later but we don't have to accept to live our lives with that in our minds. I'm choosing not to. This is my line in the sand. I won't be ruled by what-if's anymore.

This last few weeks has been testing in that area though - our Young Survivors group lost another two precious women shockingly and heartbreakingly fast to this disease...our 4th so far, and the same week our family lost a dear and beautiful friend who lived with her metastatic diagnosis for 7 years. It hits you like a smack in the face and for those newly diagnosed it is scary. It was important to remember that those women had their own story though - I couldn't let that get me down for too long. Life needs to be lived...and I know that all five of those women would agree with that. 

So, if you had been there to see my face when I first bumbled into my bathroom in my hospital room and looked at my battered, bandaged rather wobbly-headed self in the mirror you would have known. Yes this is right. I couldn't stop grinning.

Looking down and seeing a cleavage, feeling a breast shape and knowing it was done successfully and skillfully just to make me feel whole is powerful. I had a whole amazing team of medical staff, not to mention amazing support from my family, a husband who despite his concerns has seen the positive effect this has had on my mindset and gets it, a cheerleading squad of relatives, friends, blogging friends, my YS and Shocking Pink sisters and even strangers. If that isn't humbling and powerful then I don't know what is.

I'm three and a quarter years past my cancer diagnosis. This road is a tricky and rocky one at times but I'm finally starting to move on and really get on with life properly. I have a lot of plans, the main one is to live till I'm an old lady.

xx

*I did get the bonus of a flat tummy; with all that extra skin gained from the fluctuations of pregnancy to three children gone. The surgical team even gave me an extra bonus of tightening the remaining muscles for me and therefore a stomach I haven't seen since I was 22!


13 July 2013

What I've been doing (in pictures)

A mix of camera and phone camera pics...


1. Hospital stay; tubes, IV fluids, grey skies outside and terrible food. Not photographed; awesome nurses, great room, friends to visit and new boob!
2. My array of meds and supplements next to the bed. Since getting back I've had coldsores, thrush, dodgey tummy and Owen is on a mission to build my blood up strong again.
3. My comfy spot on the couch
4. My favourite socks and wearing pj's all the time. I love the excuse.
5. Amusing myself with nail painting, making a cake, having my first coffee, flowers from my cousins and a quick visit to the op shop yeilding some cute results.
6. Reflecting on the death of three amazing and beautiful women from breast cancer in one week. Two young mums and a family friend for over 30 years. Remembering how far we've come and how blessed we are.
7, 8, 9. Gifts and loveliness from friends and family. 


Love, laughter, gratitude and friendship has permeated the last few weeks once again.

11 July 2013

Red Velvet Cake


Not the best cake I've ever presented...and it took me aaaages. But I made a cake (with plenty of sit downs in between and a long time reading and getting my head around the recipe, despite knowing it quite well already) that was edible and hit the spot. I'd been dreaming of this cake a couple of days beforehand and the craving could not be contained.

Yay.


Back to the couch.


I used the Hummingbird bakery red velvet cupcake recipe. The best red velvet recipe ever.

01 July 2013

Hello!

I'm baaaack.

I've been cut open, stabbed, pricked, prodded, poked, cut open again, squeezed and refilled completely with blood. I had 11 days of hard work. But its done. And I'm home.
And I look down at my lady lumps and I smile so hard!

Short story is that I had a successful 7 hour 15 minute operation and got discharged a day early as I was doing so well. Three hours after being home though I developed a bleed and had to go back up to Auckland to have it fixed, so I had another 2 and a half hour surgery to stop the blood flow, then a blood transfusion and ended up in Middlemore for another 4 nights. I'm absolutely knackered, sore, sleep deprived. But I'm also ecstatically happy, grateful, blessed, loved and glad. Glad to be okay, grateful my kids had awesome care thanks to my mum and dad and Owen. Blessed with amazing staff and care and happy because my new boob does actually look incredible. Loved because so many people sent us thoughts, packages, prayers and kind words and also because my husband got to be at my side through all the tough parts and for that I am so grateful, he was amazing.

I'll be away from here a bit longer as my ability to sit at the computer is still not great. The words start to swim in front of my eyes a little bit and I need to catch up on a lot of sleep but I thought I'd check in and let you know I'm good! And to say thank you for your thoughts and prayers over the last few weeks.

xx

12 June 2013

Take Two

I've known since last week that I might have a date, but I didn't want to say much here in case of yet another cancellation. But with confirmation from the team yesterday I'm pretty safe to say I have another date for surgery. Next Tuesday at 6.30am I will rock up to Middlemore Hospital for an 8 hour surgery. This is where they will take bits and pieces from me and patch me up a new breast. I'm looking forward to the end result, but the anticipation of all that goes with the surgery is making making very nervous. 

I'm taking medication for hives as I'm breaking out in all sorts of strange skin things. My stomach is a ball of nerves and I'm making all sorts of mental lists for next week. There's baking to be done, meals to pre-prepare and the house to clean. It's almost like nesting waiting for a baby. Except I wasn't this nervous waiting for any of my three to be born.

 Owen is staying down here with the kids for the week as we have decided to keep things as normal as possible, then they will come up at the weekend. So I'm gonna miss my partner in crime like crazy, and the kids as I'm also going to miss my little man's 6th birthday. The girls have been a little teary and worried so I'm soothing their fears and worry as much as mine.

But it is happening and for that I'm supremely thankful. I'm obviously going to be away from the blog for a period of time, I'll try my best to update how I'm going but I can't promise anything. If I get all my lists done I might even schedule some posts, but it's not my priority really.

I'm gonna leave you with some photos taken by Owen over 3 years ago, the day before my mastectomy surgery. Owen and the girls and I went for a walk to the beach just to spend some time together before everything changed forever. It's amazing to think that was 3 years ago!


And this pic was taken post mastectomy...


07 June 2013

Afghan Cookies

Here's another Edmonds favourite recipe in our house. Afghans.
Easy, crunchy, yummy.


I use the Edmonds recipe as a base for mine but I have a few little adaptations of my own. Using the dark muscovado sugar adds a whole depth of delicious flavour but you can just use white sugar in this as the original recipe does. I also use weetbix instead of the two cups of cornflakes as the crunch with weetbix lasts longer than cornflakes and it's easier to mix. And I just like it better.

Here's the recipe:

200g butter
1/2 cup Billingtons dark muscovado sugar
1 1/4 plain flour
1/4 cup cocoa
3 weetbix, crushed
handful of chocolate buttons
handful of almonds


Cream the butter and sugar until really light and fluffy.
Add sifted flour & cocoa and stir into the creamed mixture. Add in the weetbix and beat until all well combined.

Using a teaspoon or a cookie scoop roll balls of mixture onto a lined baking tray and flatten slightly.
Bake for 15 minutes at 180 deg C.

Afterwards melt the chocolate buttons and spoon on then pop an almond on the top.
Alternatively you could just firmly squish the button on the uncooked mixture and bake it in. I've been known to use squares of delicious Cadbury milk chocolate when buttons and almonds have been in short supply!

This comes in a category of an easy morning tea knock up, or quick lunch box add on as the recipe does not take very long to prepare or bake.


05 June 2013

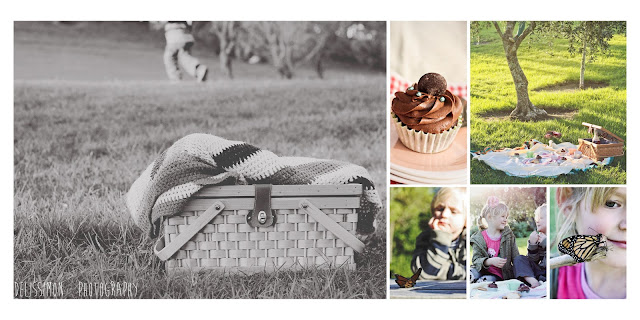
Delissimon - Photography

I'm very happy to announce I have a new venture on board as my Delissimon empire grows (mwahahaha!).

As of last week, if you have been following my facebook page I have launched Delissimon - Photography - specialising in family and children's portraiture. Click on the link or there is also a link on the tabs above.

I'm really really super excited about this, it's been in my plans for a while however I've finally decided to stop wasting time and really go for it. My first shoot down here in Katikati is coming up this weekend which I'm really looking forward to. My own children of course have been my main muses over the years, and I imagine will continue to be. It's been great having them to practice on and grow my own confidence.


I'll keep posting some of my favourites here but most shoots will be posted up over on the photography page. Please contact me if you are interested in a shoot. I'm occasionally up in Auckland for family and other stuff too so if you are up there and interested in meeting up I can let you know when I am available.

xx

Mon